
Add and manage policies
Add a policy
Section titled “Add a policy”- Open Policies from the navigation. This is the policy library, not the general child-document uploader.
- Select Add Policy.
- Enter the policy details requested by the form. Use a clear policy title and accurate description or reference information where the form provides it.
- Select the policy file to upload.
- Check the uploaded date. Enter or confirm the date the document was issued or uploaded, as appropriate to the field label.
- Enter the Review date. This is required. Use the date your setting has approved for review; do not assume SAEL selects a statutory review date for you.
- Review the file and dates, then select the save action.
- Confirm that the policy appears in the list. Open or download it to check the correct version was saved.
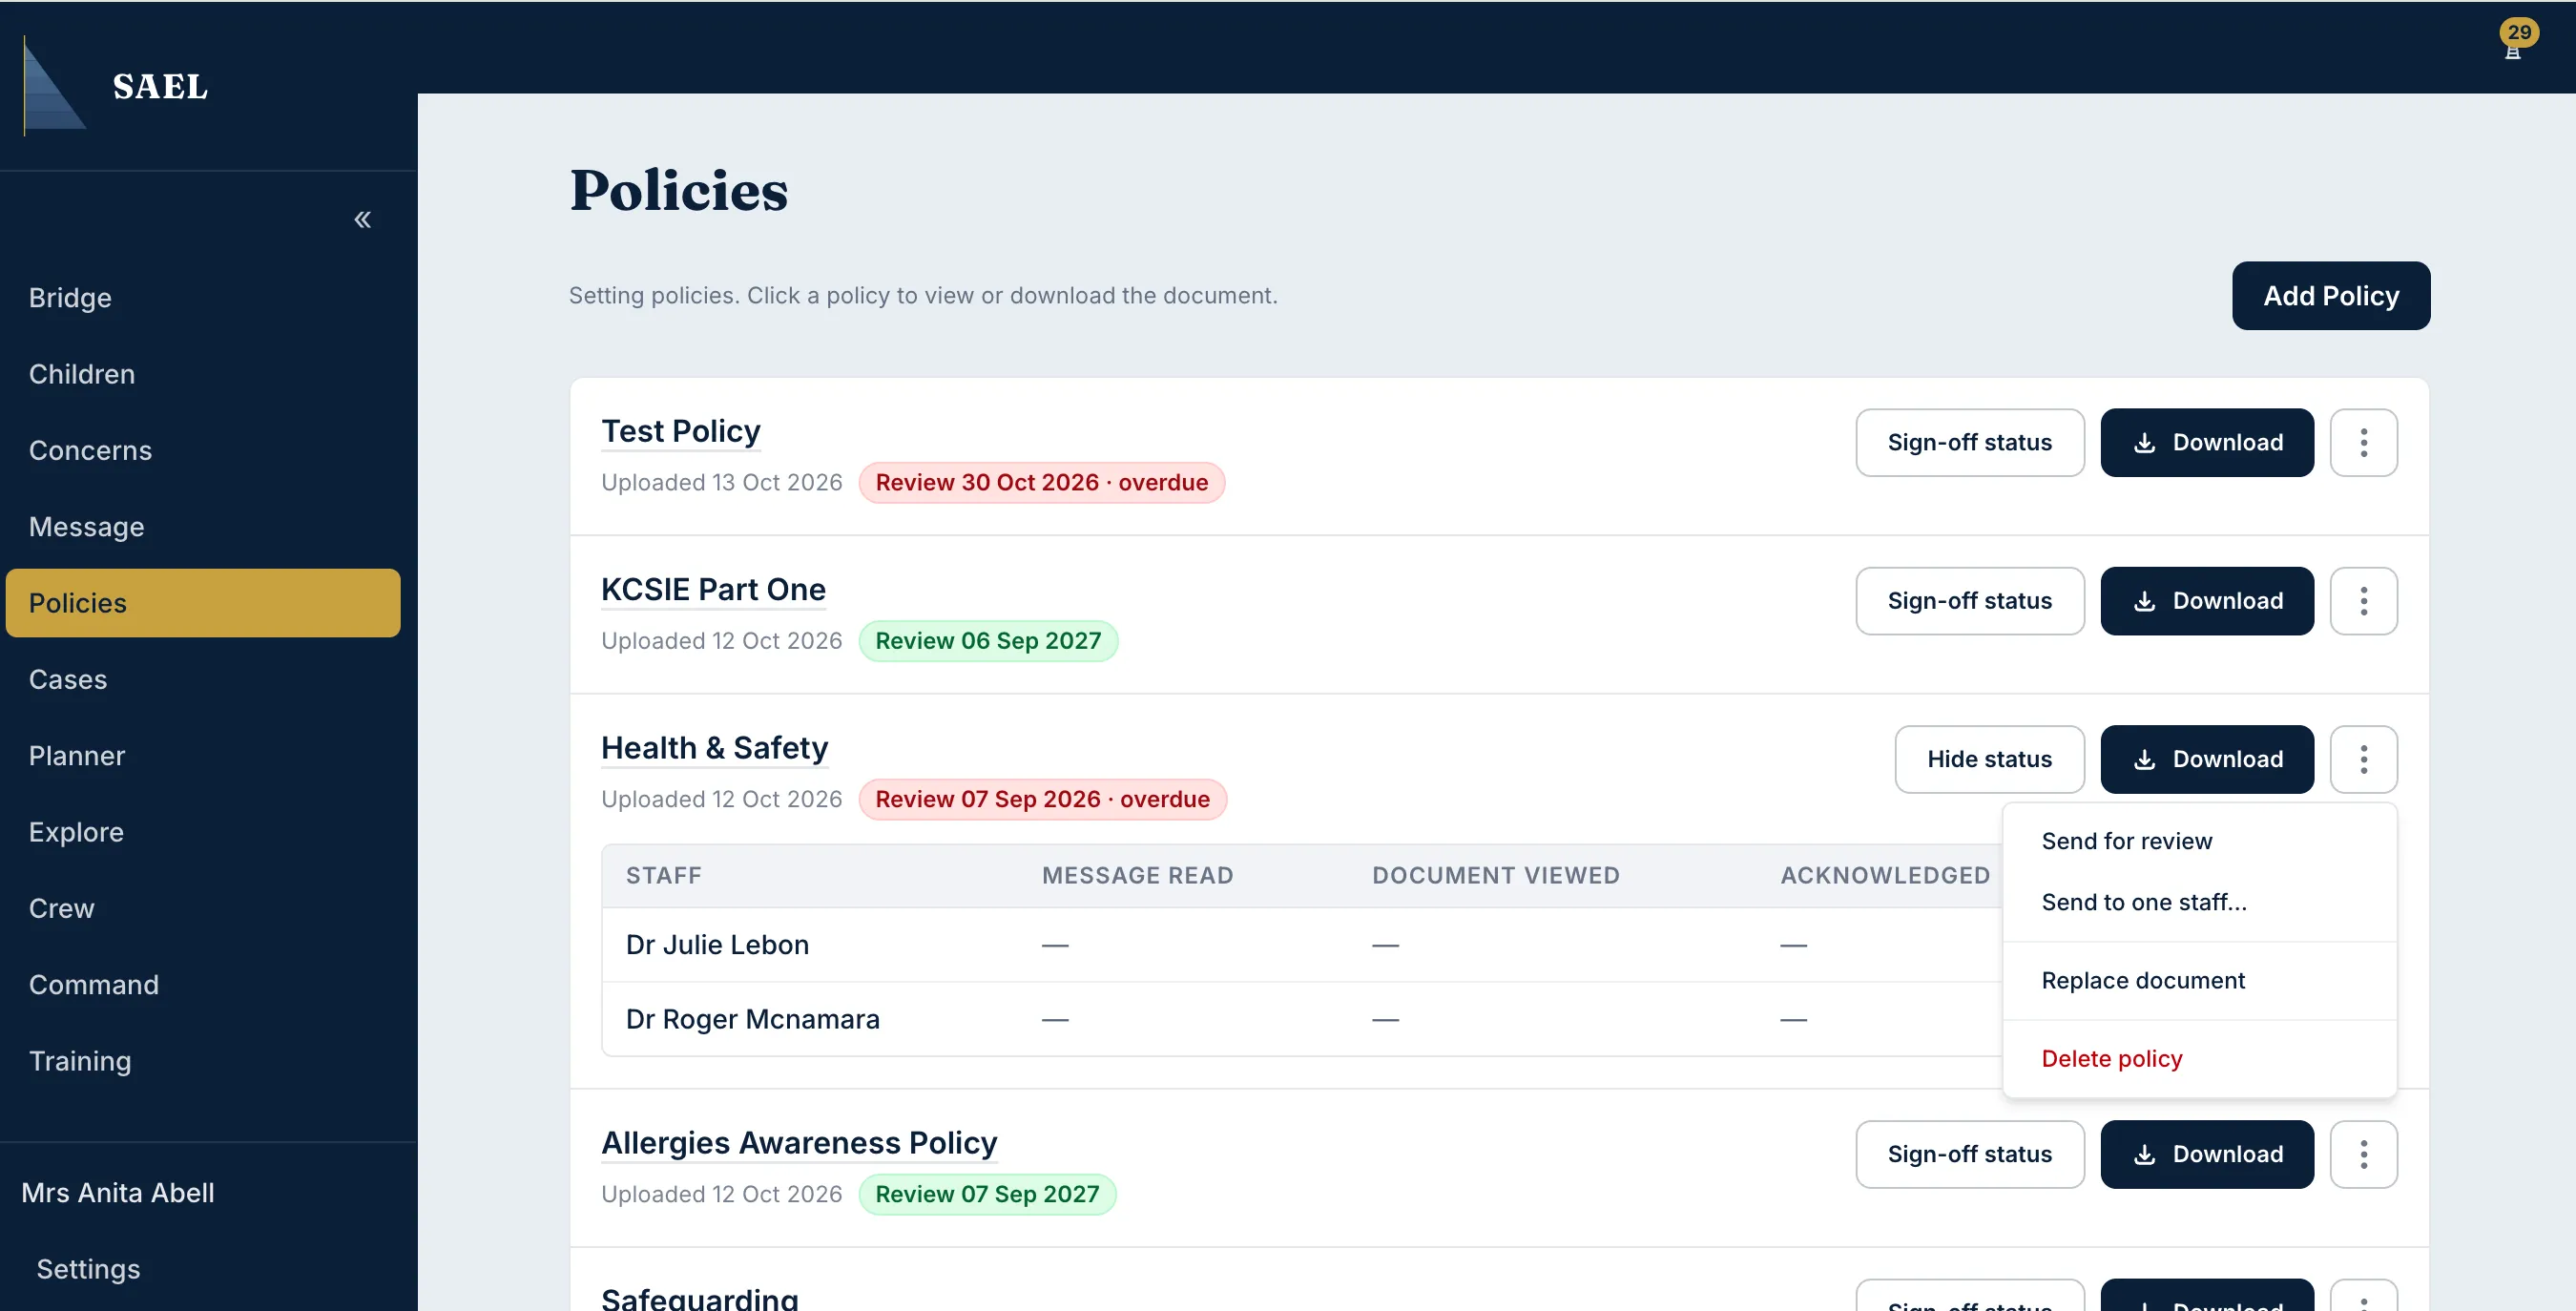
Open and download a policy
Section titled “Open and download a policy”Select the policy’s document/title area to download or open it. Some rows can be expanded for further detail. Check the review date as well as the upload date: an uploaded policy may still be due for review.
Replace a policy document
Section titled “Replace a policy document”- Open the policy row’s More actions menu.
- Select Replace or the replacement action shown.
- Choose the new policy document.
- Check that you are replacing the intended policy and that the replacement is the approved version.
- Submit the replacement and reopen the policy to verify the new file.
Delete a policy
Section titled “Delete a policy”Use More actions → Delete, read the confirmation panel and confirm only when you are certain the policy record should be removed. If the policy is merely out of date, consider replacing the document and updating its review information instead of deleting the history your setting needs.