
Configure concern routing
Open Concern routing
Section titled “Open Concern routing”- Open Command → Safeguarding.
- Select Concern routing.
- Review the current table before editing. It lists each rule’s trigger (When), the people or roles whose inbox receives it (Inbox), the people or roles who are Notified, the Reviewer and whether the rule is Active.
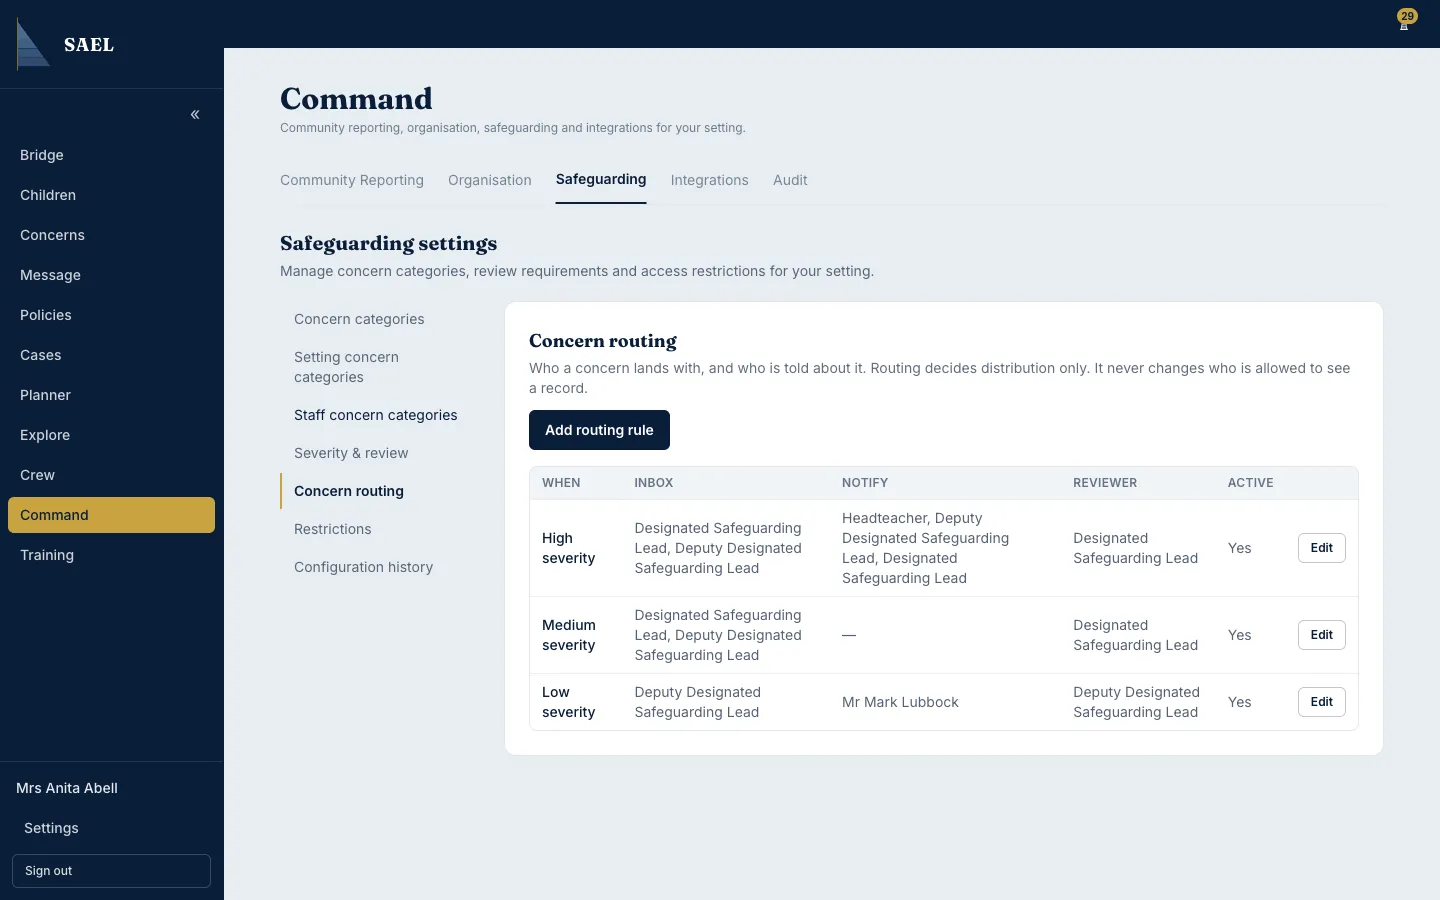
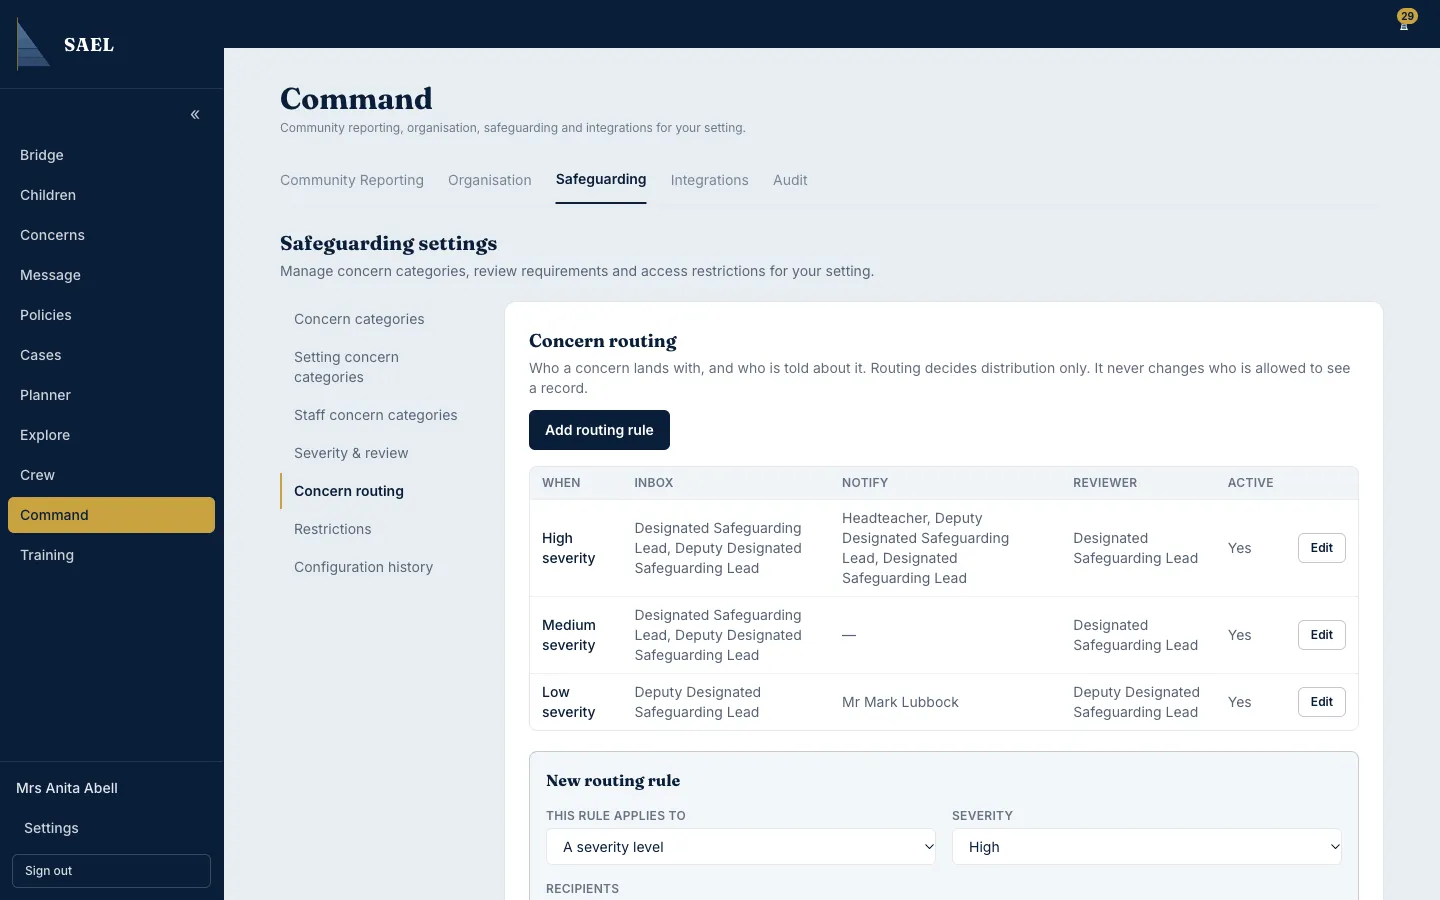
- Select Edit on an existing row to change it, or Add routing rule to create a new one.
Choose the rule trigger
Section titled “Choose the rule trigger”In This rule applies to, choose the condition that should activate the rule:
- A severity level: applies to a selected Low, Medium or High concern.
- A concern category: applies when a selected category is used.
- A category at a severity: requires both a category and severity match.
- Everything else: the default rule for concerns that do not match a more specific rule.
- Injury signature overdue: an additional trigger for the overdue injury-signature workflow where that workflow is in use.
If you choose a category trigger, select the category in Category. If the trigger uses severity, select the level in Severity. SAEL only shows the extra field required by the trigger you chose.
Add recipients
Section titled “Add recipients”- Under Recipients, use the first dropdown on a recipient row to choose Goes in their inbox or Notified only.
- Use the next dropdown to choose A role or A named person.
- If you chose a role, select it from the role list. The list can include standard roles and active custom roles for this setting.
- If you chose a named person, select the person from the staff dropdown.
- Select Add recipient to add another row.
- Use Remove on a row to remove a recipient that should not be part of the rule.
At least one recipient is required. Each row must identify a role or a named person; a blank recipient will prevent saving. Check the distinction between inbox and notification: a person marked Notified only receives a notification but is not added to the rule’s inbox recipients.
Set the primary reviewer and escalation
Section titled “Set the primary reviewer and escalation”- Under Primary reviewer (role), select a standard role or a setting role. Choose None only when you intend to use a named reviewer instead.
- Alternatively, open Or a named reviewer and choose the staff member who should review the concern. Selecting a named reviewer disables the role field for that reviewer.
- Under Escalate to (role), choose the role that should receive escalation, or choose No escalation.
- Enter Escalate after (minutes) when an escalation target is configured. Use the delay agreed by the safeguarding leadership team.
- Select Rule is active when the rule should apply to new concerns. Leave it inactive when you are preparing or retaining a rule that should not yet be used.
Check the effective configuration preview
Section titled “Check the effective configuration preview”Read the Effective configuration preview. It shows the resolved Inbox, Notified, Reviewer and Escalation result. Check that it identifies the intended people, not just a role label that no current staff member holds.
Save and verify
Section titled “Save and verify”- Enter a reason in Reason for this change if useful for the audit trail. The field is optional in the form.
- Select Save routing rule.
- Wait for the Routing rule saved confirmation.
- Check the rule in the table, including its trigger, inbox recipients, notification recipients, reviewer and Active state.
- Open Safeguarding → Configuration history to review the saved change.
Important: routing controls distribution only. It does not grant permission to see the concern. A recipient still needs the appropriate record access. A routing rule is also not a substitute for a DSL reviewing a concern or acting immediately where required.