
Send an external Journey
Start an external Journey
Section titled “Start an external Journey”- Open the relevant child record or select the child from the Children register.
- Open the Journey/transfer action and choose the external route where it is available.
- Enter the receiving setting’s name.
- Add a recipient contact and reason where requested. The reason is retained as part of the audit trail.
- Review the priority recommendation shown by SAEL. If you change the suggested flag, provide the reason requested by the form.
- Select the documents that should be included. Check each item; do not include unrelated or unnecessary information.
- Enter the recipient’s email address.
- Choose the access-link expiry period offered by the form: 24 hours or 72 hours.
- Review the recipient, selected documents and expiry before creating the Journey.
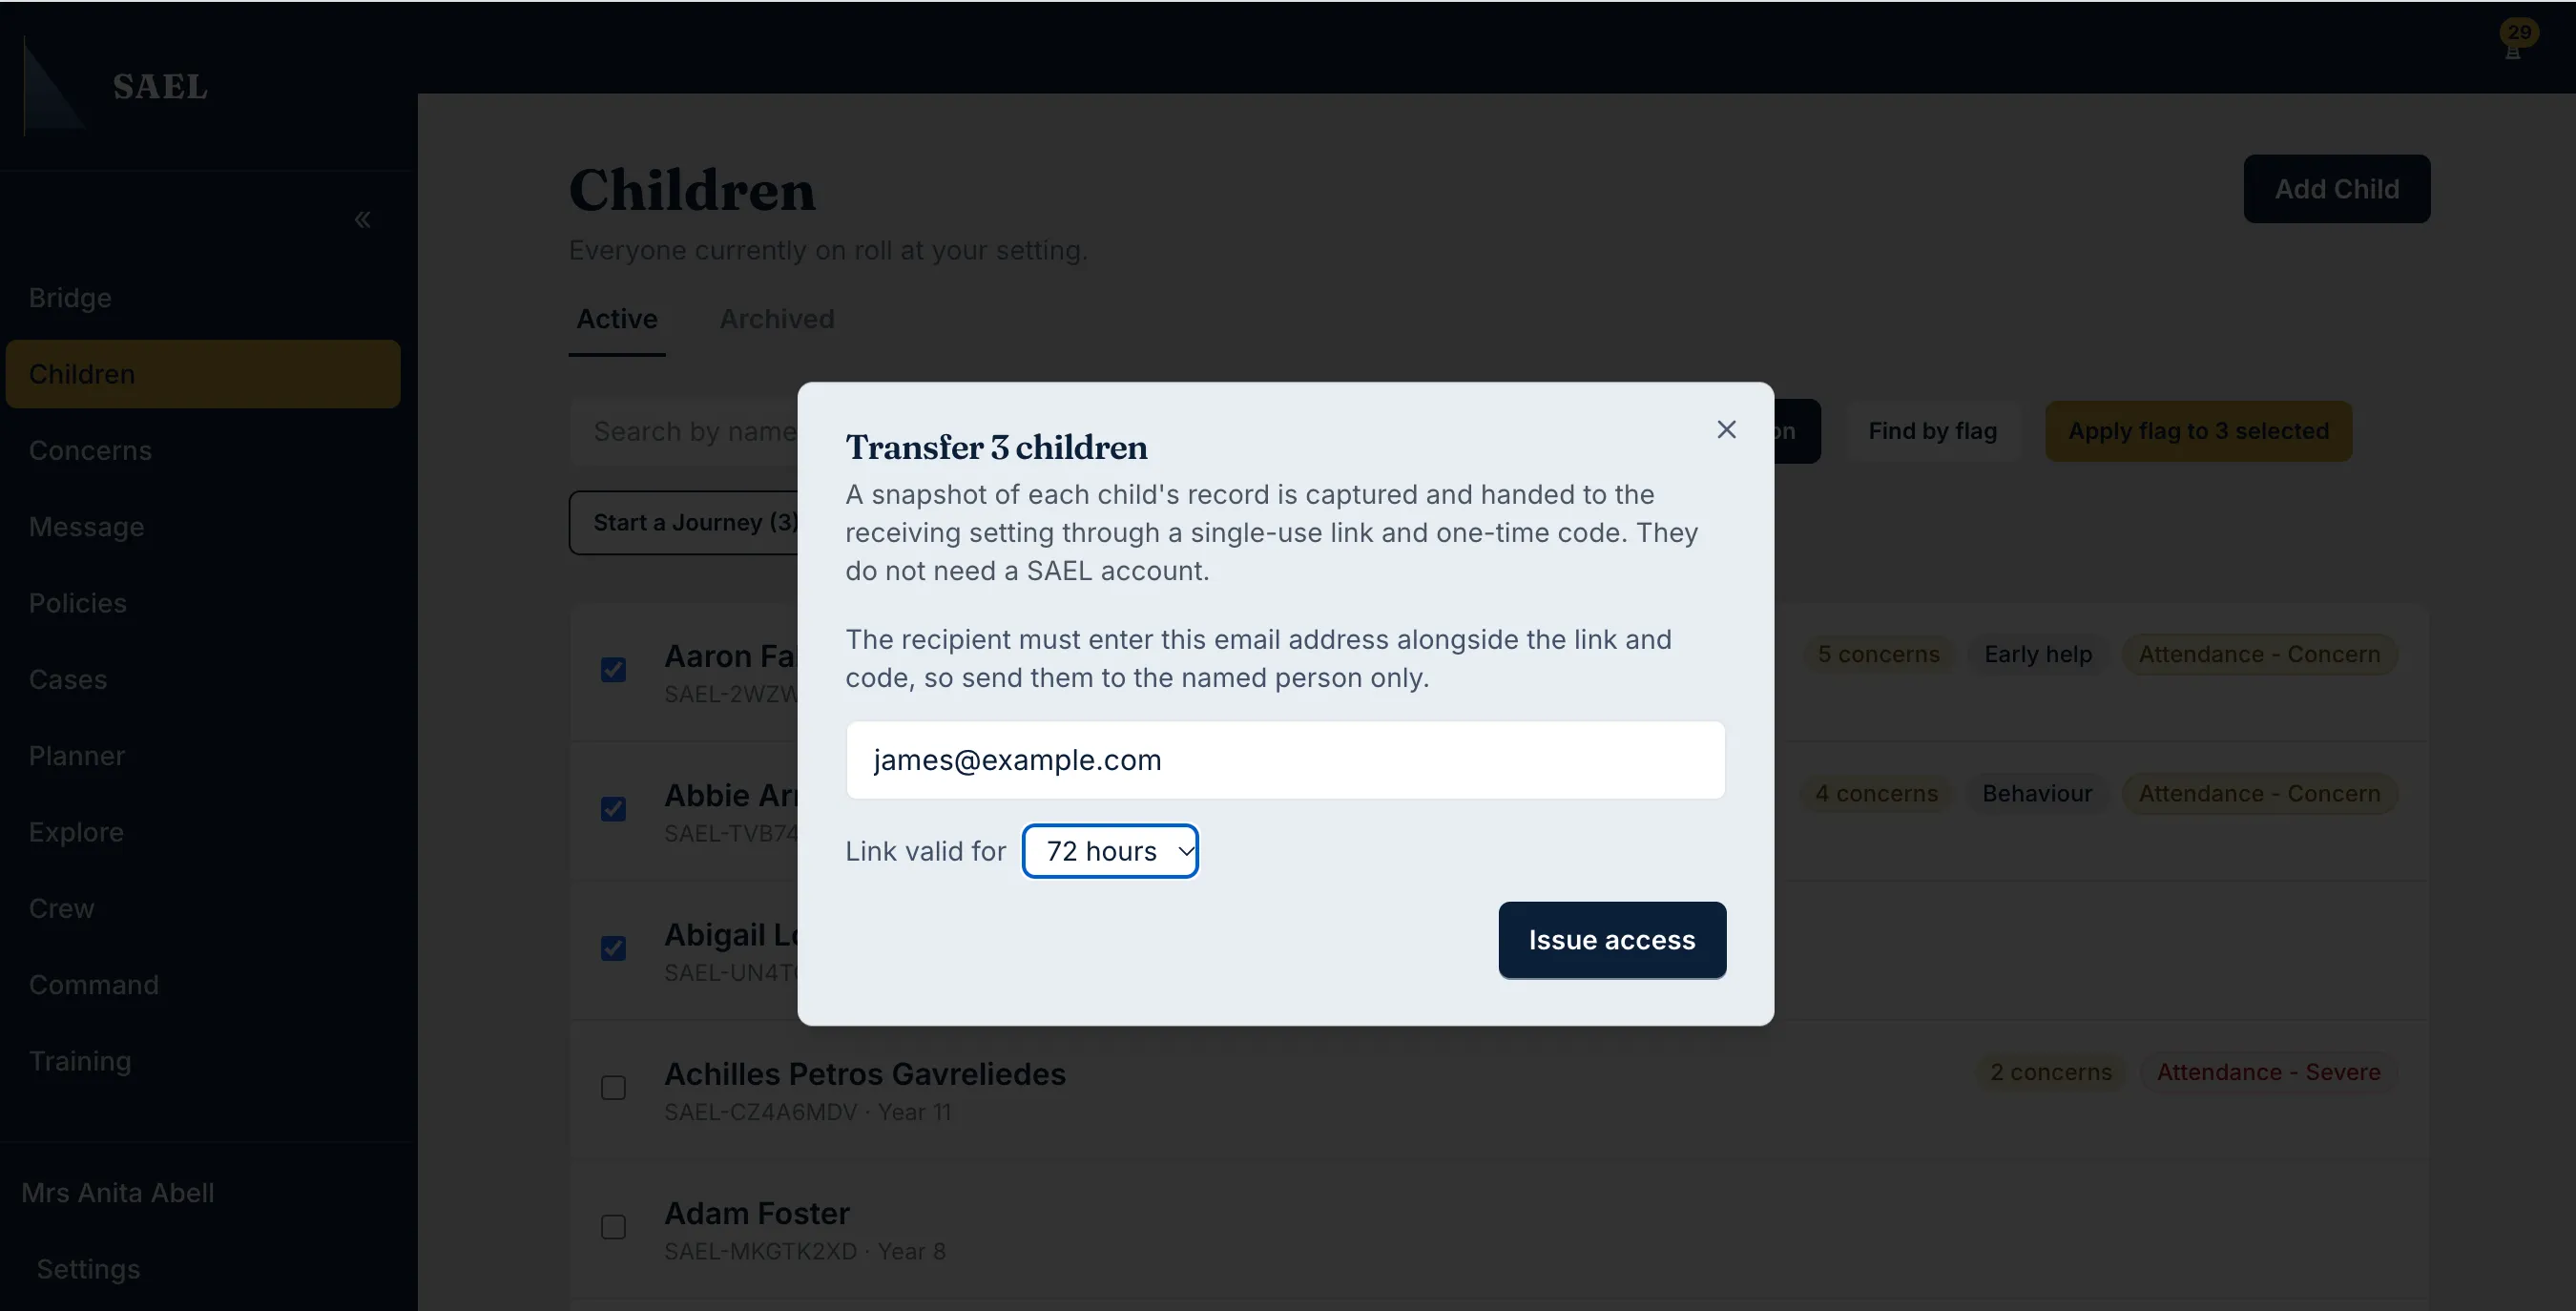
- Submit the Journey request.
Share the one-time access details safely
Section titled “Share the one-time access details safely”Where the external access link is created, SAEL can email the link to the recipient. The one-time access code is not emailed with it. SAEL shows the access details once; copy them at that point and pass the code to the recipient separately through a suitable secure channel.
Do not put the link and code together in the same email or public message. Do not assume you can retrieve the original access code later. If you did not copy it when shown, contact SAEL support for the correct next step rather than trying to reconstruct it.
Track the Journey
Section titled “Track the Journey”Use the Journey queue to review its status. The recipient’s access is time-limited and follows the expiry period chosen when it was created.